Image views
Applies to: All programs
Version 4.7 of the software introduced image 'views' where images can have multiple versions each with their own cropping and scaling.
Key points
- Images can have one or more views together with their original or default view
- Views are given a name eg 'ID' or 'export'
- Images in views can be independently cropped and scaled
- Views can be used in many parts of the software such as image holes, ordering and exports
Scope
There are many occasions when a photographer may need to use the same image with variety of different crops. For example a 'standard' crop is to be used for portrait packages whereas a tighter crop is required for composite group pages while ID cards may require an even tighter head and shoulders crop of the same image.
With Version 4.7 the above scenario is handled by creating two 'views' for the images in addition to the standard or default view. The default view would be cropped and scaled as appropriate for the portrait packages. An additional 'Comp' view would be cropped tighter than the default images while images in an 'ID' view would be a very tight head and shoulders crop.
The different views can then be used in different products in a number of ways. Image holes can call a particular view while a specific view can be used when forming composite pages. Views can also be 'ordered' as an option for packages in a manner analogous to ordering an item or a specific pose.
In many ways using views is the same as using poses.
Creating views
Views are created in Images Mode using the images tool panel as shown in the screen grab below. Creating a new view is simply a matter of clicking the arrow and selecting 'Add new ...' from the drop down menu. Views can be renamed and removed in the same manner. Once views are created they appear in and are selected via the drop down list.
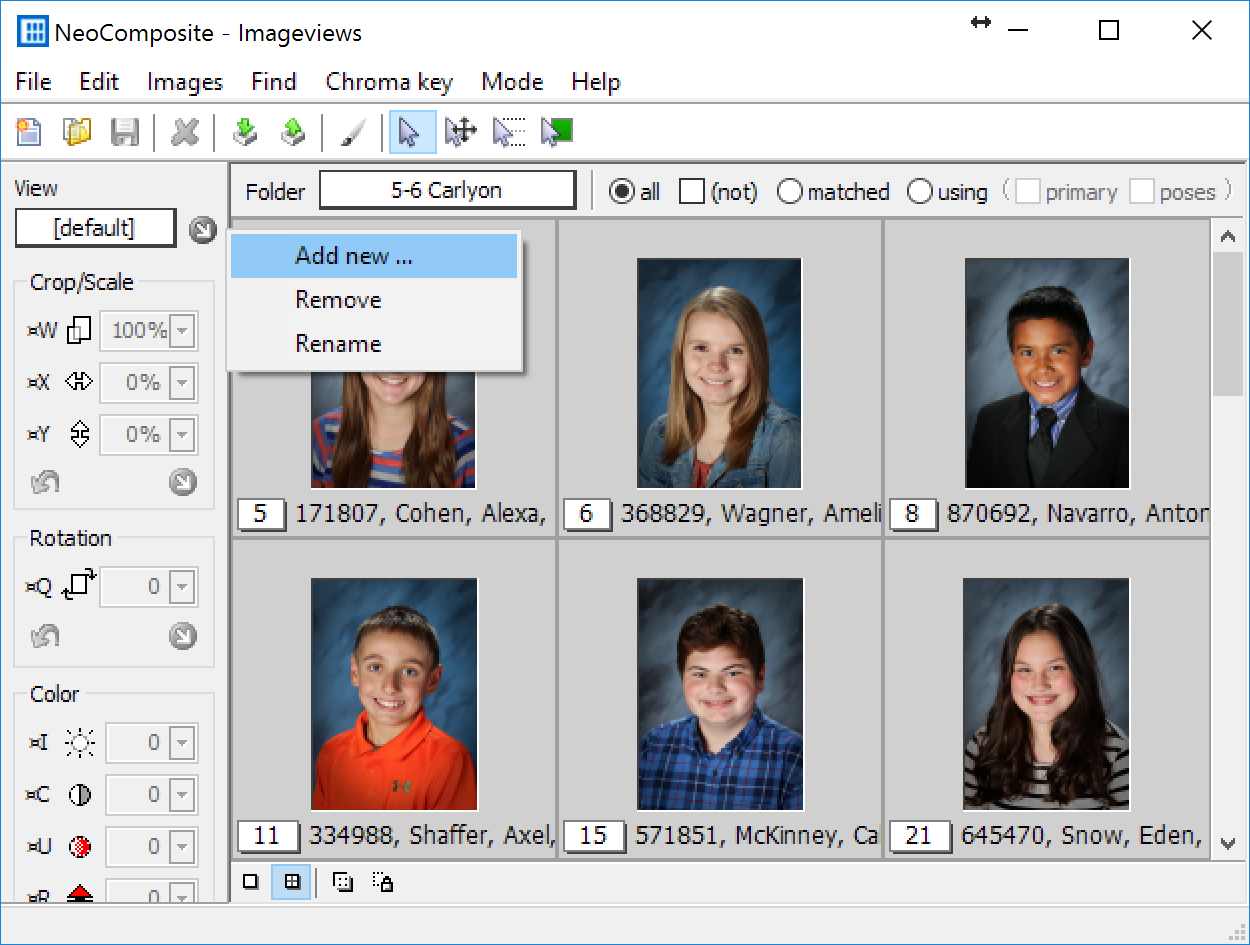
Figure 1: Creating a new view. The default view is currently displayed.
Cropping and scaling views
Images in views are cropped and scaled in the same manner as the default set.
It is important to understand cropping in a view is relative to the cropping in the default view. If the cropping in the default view is altered it will alter the cropping in the view as well. For example consider a situation where cropping in the default view is left untouched (100%). A view is created for ID cards and the images cropped to say, 120%. If the images in the default set are subsequently cropped to 110% this will have the effect of cropping the ID view to 130%.
Changing the crop of images in the default view will change the crop of images in other views. Cropping images in a view does not affect any other views or the default view.
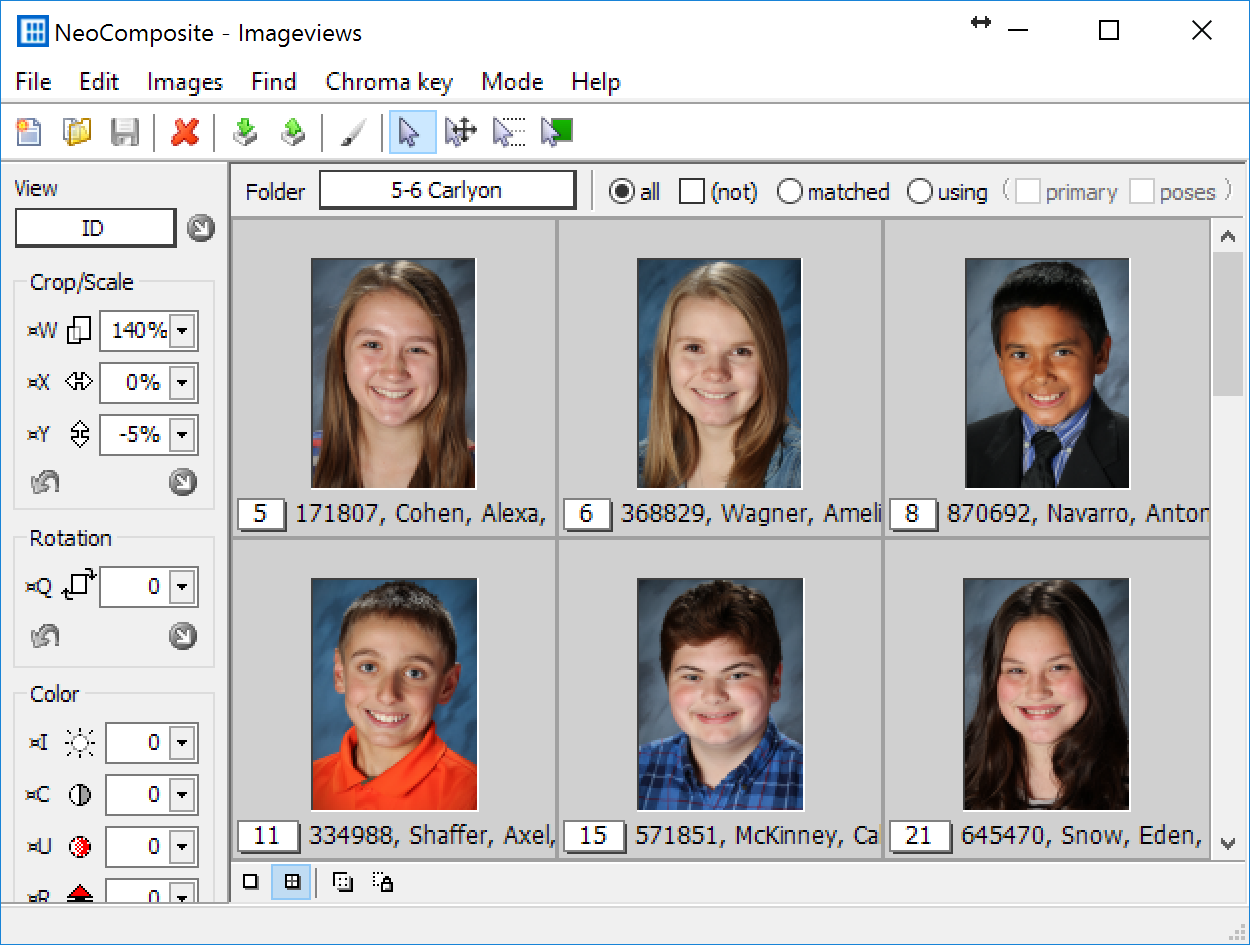
Figure 2: An 'ID' view where the images have been cropped much tighter than the default images.
Other image attributes
Views only support the independent handling of cropping and scaling. Other image properties such as colour and rotation are not supported - changing these attributes in a view will change them in all other views including the default view.
Using views
As indicated earlier using views within the software is very similar to using poses. As such wherever there is an opportunity to select, specify or order a pose, there is an equivalent opportunity with views.
Image holes
It is possible to explicitly specify a view to be used in an image hole as shown in the screen grab below. This is true for all image hole types including pack layouts, items and composite subject blocks.
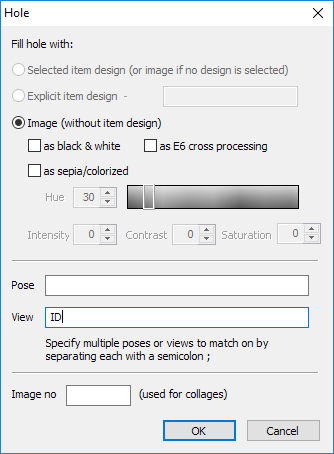
Figure 3: Specifying a view to be used in an image hole
If the specified view does not exist, the default view is used.
Point and Click Mode
Views can be manually selected in Point and Click Mode as shown below
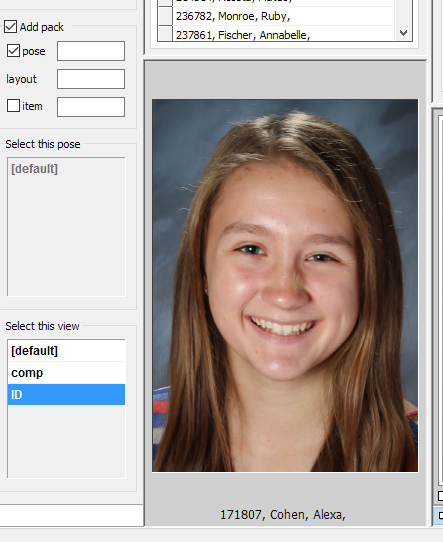
Figure 4: Selecting a view to use in Point 'n Click Mode
Composites and Item Sheets
A view can be specified when forming a composite page or when forming an Item Sheet. The screen grab shows a 'comp' view being selected when forming a composite group page.
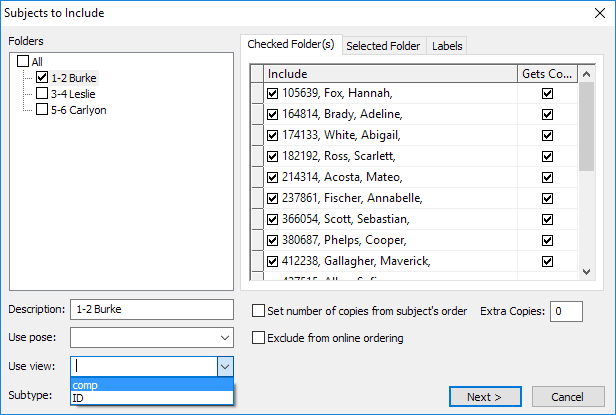
Figure 5: Selecting a view for a composite page.
Ordering packages with a specific view
In the same way packages can be ordered for a particular pose, packages can also be ordered with a specific view
Before continuing, it is important to summarize the combined order-pose- barcode. In general terms the combined barcode may be described thus:
For example the following barcode will order a package whose key is abc with item design xyz for pose number 1 and view 3
We can consider the layout key to be position 1 of the barcode, the item design key to be position 2 of the barcode, the pose number is in position 3 and pertinent to this discussion, the view is in position 4. With these definitions in mind we can move on to describe a general barcode that will order a view for a given subject.
Consider the components of this barcode
- /%O lets the software know you will be scanning order barcodes subsequently to this barcode.
- The $ symbol makes this barcode "sticky". In other words there is no need to re-scan this barcode in between each order barcode - all subsequent orders will be assigned to this view until another view barcode is scanned. This holds true even if another subject is scanned. Substitute the $ symbol with a + symbol to turn off the "sticky" feature.
- The sequence P4 is "position 4" as described above and view is the view as defined in Images Mode.
The following barcode therefore selects view 2.